Posts Tagged ‘tomatoes’

Spring 2011 plantings in pictures

3 November, 2011

I’ve done a bit better this spring. I actually got most of my vegetable seeds and seedlings in at the right time in Spring, i.e. at the beginning of the season, rather than the end of it like last year.

Right now the garden is bursting with a heap of growth (verdant, AnnMaree just called it), some a few weeks old, some planted just this morning. There are tomatoes (mostly planned, others not so much), spinach, capsicum (hangers-on from the winter crop, but they don’t take up too much space), French beans, oak head lettuce, Lebanese cucumbers, eggplants and sweet corn down the western end. Hopefully all of it will have been harvested by the end of summer, if not before, and not be limping on into autumn and ruining my mid-2012 schedule. We’ll see. Mother Nature can be somewhat capricious – anybody else noticed that?

I thought that instead of coming up with a thousand words I’d just let the pictures do the talking, so here goes:

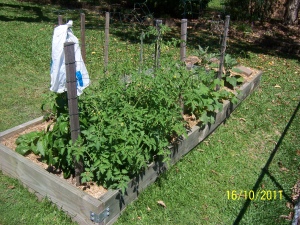
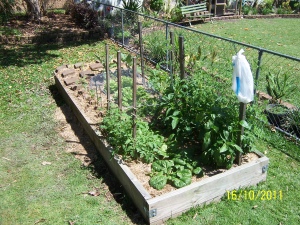
View of the vege garden from the southeast, Spring 2011

View of the vege garden from the southeast

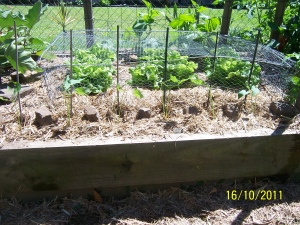
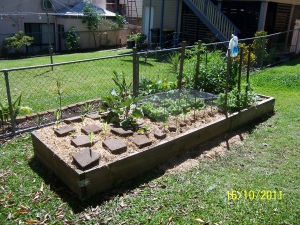
View of the garden from the southwest with Helena's backyard in the background

View from the southwest with Helena's backyard in the background

Central section, with beans, lettuce and cucumber

Central section, with beans, lettuce and cucumber

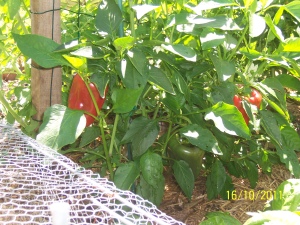
The capsicums growing well

The capsicums, already growing well

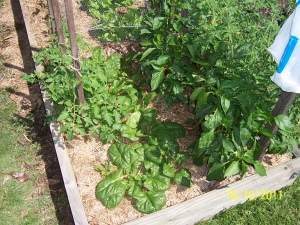
Tomatoes, spinach and capsicum

Tomatoes, spinach, capsicum

The vegetable garden viewed from the northeast, Spring 2011

The garden as viewed from the northeast

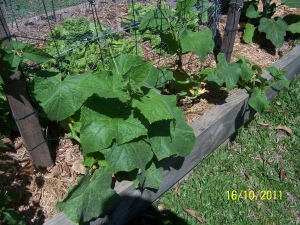
Cucumbers

Cucumbers

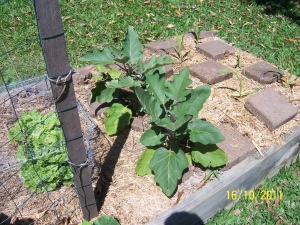
Eggplant

Eggplant - 2 large, 1 runt

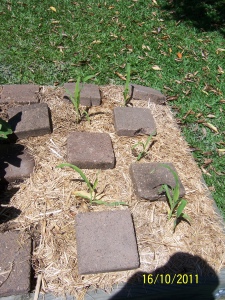
Sweet corn, western end

Sweet corn, Spring 2011

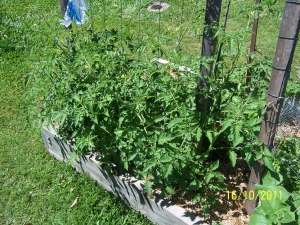
Tomatoes, already going feral

Tomatoes, already starting to go feral

First corn harvested

7 January, 2010
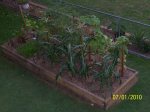
The vegetable garden at dusk, with sweet corn plants in the foreground.

The vegetable garden at dusk, with sweet corn plants in the foreground.

I came home from work a bit early this afternoon, having had a persistent stomach ache since yesterday evening. Amazed I managed to stay at work for most of the day, actually. I then took to my bed for a Gardener Scampus Power Nap, and was woken by the Other Half arriving home around 6pm.

She suggested maybe it was time to harvest one of the cobs of corn. Gulp. The first corn harvest!

It was with some trepidation that I ventured down the back stairs. While many of the cobs’ tassels have already turned brown and shrivelled up, they’ve still seemed a little small to be harvesting just yet. So I’d been putting that off for the past week or so. But now it was time to find out if the wait (something like 11 weeks) had been worth it.

Because of its reasonable size, I chose a cob from one of the two plants at the eastern, outer end of the box. A twist one way, a twist the other way, and it was free from its nice, cosy spot snuggled up against the plant’s stem. (I had a fleeing thought at this point that maybe removing this particular cob would give a boost to the other cob on the plant, which remains somewhat undersized. Probably doesn’t work that way…)

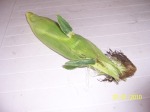
First cob of sweet corn harvested

First cob of sweet corn harvested, showing the small area of black 'smut' on the husk. False alarm, fortunately.

Pulling back the outermost green husks, I noted a bit of what looked like black smut on one of them. Heavens to hamburgers! Hope this didn’t mean that some of that copious rainwater of the past few weeks had snuck inside and ruined the kernels.

AnnMaree had come down into the back yard at this point, so like the coward I am I handed the cob over to her for the final check out. She pulled back all the rest of the coverings and exposed the all-important kernels. What do you know? They were perfect – firm and yellow, and all there.

Alright! Success!

So now perhaps I won’t be so loath to harvest a couple more over the next few days, before we head to NZ next week.

Tomatoes

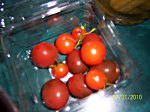
Cherry tomatoes, just picked, mixed in with store-bought "kumatoes".

Cherry tomatoes, just picked, mixed in with store-bought "kumatoes" and ready to be added to the evening's salad. (Apologies for the blurring)

While I was down there I grabbed another handful of cherry tomatoes – they’ve been ripening in dribs and drabs for the past couple of weeks now.

With the toms, it’s been a bit of a race between the fruit ripening and the leaves all falling off at least 3 of the plants from the wilt disease (possibly Fusarium Wilt, by its looks) they’ve picked up in the past week or 2.

By sheer chance I originally bought the “Sweetbite” brand of cherry tomatores. Later Peter Cundall told me that Sweetbite ‘is extraordinarily disease resistant’…! Riiiiight. Hmmmph. I fear that my garden appears to be one of those exceptions that proves the experts’ rule.

From other things I’ve read, I’m guessing I won’t be able to grow any more tomatoes in the same soil for at least 3 years, as it can take at least that long for the wilt fungus to work its way out of the soil. Ouch – that’s a long time to wait between crops!

Dinner

We had salad with our pork chops tonight. It included the handful of cherry toms I picked this afternoon. But taking pride of place in the salad were the kernels from our first successfully grown and harvested cob of sweet corn. The kernels were sweet, and, waxing lyrical for a moment, I guess it shows that sometimes life itself can be sweet. Despite a stomach ache.

The Annexe

7 November, 2009

The situation

Yesterday’s major effort to fully plant up the vegetable garden left 7 unused seedlings still drooping forlornly in their punnets:

  • 2 cherry tomatoes
  • 1 Lebanese cucumber
  • 4 chillies, comprising:
    • 2 Cayenne
    • 1 Anaheim
    • 1 Jalapeño
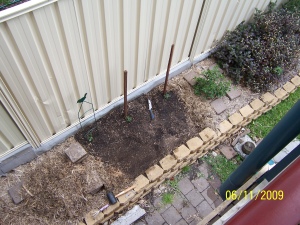
Overflow garden as seen from the back deck

Overflow garden as seen from the back deck, next to established plants

There’s a large amount of garden space in our back yard, hugging the fences on all 3 sides. Now it so happens that one part of it, about 3 metres’ worth on the upper, southern side nearest the deck, is empty.

It used to be shaded, a little too well, by a Macadamia nut tree that leaned over the fence from George the upper side neighbour’s yard, so we’d really never grown anything there.

(That Macadamia was a wonderful tree – big enough to partly shade our back deck, making it considerably cooler on those stinking hot summer days of ours. The new, wind-down shade we had installed after it was gone is okay, good even, but still… I miss the tree, its leaves, its birds, and even its occasional possum denizens.)

Anyway, about 8 months back George finally had the nut tree chopped down – it had been heavily crowded out by both our and his back decks for years, so major branches had been lopped off here and there. It was starting to look lopsided. (Hmmm, could it be this is where the term “lopsided” comes from…?)
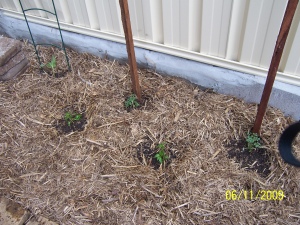
Overflow garden, planted and mulched

The overflow garden, planted, trellised and mulched.

After the tree went, we realised that the area of never-used garden bed below it was now far more exposed to the sun and therefore more “plantable”. So I got in a half metre of organic garden soil from Camp Hill Timber and Landscape, our nearest supplier of landscaping supplies. After adding the soil to the bed I’d then thoroughly swaddled it in sugar cane mulch and used some of the ubiquitous old pavers to protect the mulch (not all that successfully, let’s face it) from cat attack. And that’s how the bed has stayed ever since, waiting for a purpose.

Well, almost half of it now has that purpose.

The process

I spent a pleasant couple of hours in the middle of the day there (fortunately it was cloudy and so not too hot), first removing the pavers and scraping the mulch back out of the way. I then dug up the areas where the excess seedlings were to go and added a measure of compost to each area, mixing it well through the soil. Wetting everything down thoroughly at each step I transplanted the seedlings into position, putting in a stake or trellis next to those that will need it (the tomatoes and cucumber). I finished off by re-mulching around the new denizens, making sure to keep the mulch at least 5 centimetres away from the seedling stems so the organisms that break down the mulch don’t focus on the stems instead, and “re-paving” the lot for ongoing protection. Step back and away, and the job ’tis done.
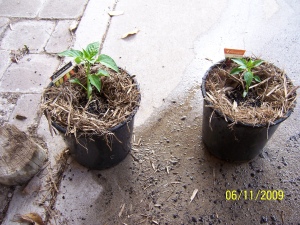
Potted chillies (Jalapeno and Anaheim) destined for the back deck

Potted chillies (Jalapeño and Anaheim) destined for the back deck

Oh, and while I was at it, I potted up the last 2 remaining chillies, the  Anaheim and the Jalapeño, and put them upstairs on the back deck.

The outcome

The new, ‘overflow’ vege garden is hereby dubbed the Annexe. I can see it going one way or the other – either down in flames and eaten out because it’s closer to the fence and may be easier and safer for the possums to reach; or it’ll flourish because it’s somewhat more out of site and sheltered than the main bed out in the yard.

What’s the bet?

(P.S. Ignore the date on the photos – it’s wrong. I accidentally set the camera date to the day before after recharging the battery overnight. A true GardenerScampus moment – no doubt merely the first of many more.)
Initial plantings

6 November, 2009
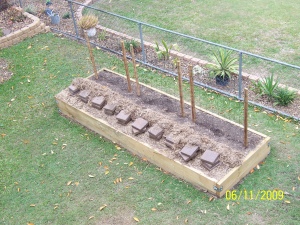
The garden bed - trellises in place

Figure 1. The garden bed - trellises already in place (I forgot to take a photo earlier in the process)

The garden bed is located close to the lower, northern side of the backyard (see Figure 1). Made from 6 treated pine sleepers from Camp Hill Timber and Landscape, it’s 2 sleepers high on all sides (so I don’t have to bend down all the way to the ground while working in it) and has dimensions of 3.6 x 1.2 metres. It’s positioned so that it will receive heaps of sunshine for much of the day, but from about 2.00 to 2.30pm onwards the Fiddlewood tree down the lower back corner will completely shade it. This will hopefully save the plants from getting heatstroke due to too much exposure to our subtropical summer sun.

Trellises

First task of the day was to make myself 3 trellises, to support Lebanese Cucumbers, Cherry tomatoes and Climbing beans. I was able to make the trellises from fairly cheap materials. Each trellis consists of a metre of plastic coated, wire mesh with square holes 10 cm on a side. The mesh was stretched between 2 pine garden stakes each a little over a metre long. The mesh is actually 1.2 m high, with the top 20 cm folded over to keep things tidy. But I have a feeling I’m going to have to unfold it later, especially with the climbing beans which need a trellis up to 2 m high.

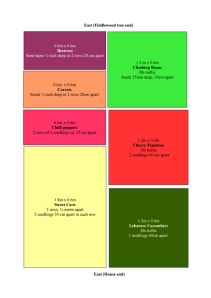
Diagram showing the layout and information about the vegetables initially planted in the garden

Figure 2. Diagram showing the layout and information about the vegetables initially planted in the garden

With the trellises built (it took about 3/4 hour sitting in the shade under the back deck) the action shifted to the garden bed itself. I first moved the sugar cane mulch back from the northern half of the bed, clearing it off the soil  in readiness. I used a rubber mallet to hammer my 3 trellises in a line down the bed, 30 cm from and parallel to the northern wall.

Lunch

Before I could start planting, the Significant Other suggested that since it was the last day of our 2 week vacation (not counting the weekend still ahead, which I suppose we would have had anyway), we should head up to the Rare Pear at Holland Park for lunch. Which we promptly did. Lunch was great, coffees weren’t bad (though not a patch on the coffees we experienced down in NSW last week – is it the milk they use?), and we were back home within the hour.

Planting the veges

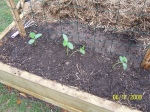
Lebanese Cucumber seedlings

Figure 3. Lebanese Cucumber seedlings planted and awaiting mulching

Back to the garden. Satiated and armed with a black and white printout of my handy dandy diagram (see Figure 2) I set to planting with a will.

  • First plants to go in were the Lebanese cucumbers – 3 seedlings, 20 cm apart.
  • Cheery tomatoes – 2 seedlings, 60 cm apart.
  • Climbing beans – 5 or 6 seeds buried 2 cm down and 10 cm apart.

Then, down the southern side of the bed, starting from the western end:

  • Radish – seeds, 1/4 inch down in two rows 20 cm apart.
  • Carrot – seeds, 1/4 inch down in two rows 20 cm apart.
  • Chillies – in 2 rows of 2 seedlings (2 Cayenne, 1 Siam, 1 Anaheim) with 25 cm between them.
  • Sweet corn – seedlings in 3 rows about 70 cm apart, 2 seedlings in each row about 35 cm apart.

I watered the plants at various stages during each planting, of course.

All up, I suppose this process took about 3 hours.

At the end there were one or more seedlings of each kind left over. AnnMaree suggested potting some of them, to go up on the back deck with the other potted herbs and plants. By this stage of the afternoon I was pretty much out of energy, so I promised I would pot some of them and plant the rest in a spare, long-prepared garden bed on the south side of the back deck… tomorrow.

I’ve also put off building a cage to go around the whole bed. It’s to be chicken wire over some kind of wooden frame, set up so that the sides can be lifted up and back to allow easy access. I’m hoping I won’t need to build this – that the possums and crows will keep their greedy claws and beaks out of it. Let’s face it, I’m kidding myself here. But I also know that building a cage of the type I have in mind is going to be a monumental undertaking (for me) and will take all of a day to do. And at heart I’m lazy, when it boils right down to it. So if I can get out of it, I will. I’ll pay for it later…

To top things off, it rained quite strongly for a short while during the night, giving the garden and its plants their first proper watering.